
|
||
| Network Testing and Emulation Solutions |
|
|
||
| Network Testing and Emulation Solutions |
This cookbook requires LANforge GUI version 5.4.6 and above.
Our LANforge InterOp solution is used to support real clients for testing access points. InterOp gives the ease of handling real clients with complete automation and detailed, customizable test reporting.
We have support for various kinds of real clients:
- Android clients.
- iOS clients.
- Windows Machines.
- Linux Machines.
- MacOS Machines.

If your mobile is in developer mode, skip to step-3.
If you are using XIAOMI mobiles [ Redmi, Poco ..etc] for LANforge Interop then please make sure that your mobile has Mi account.
Steps to create Mi account:

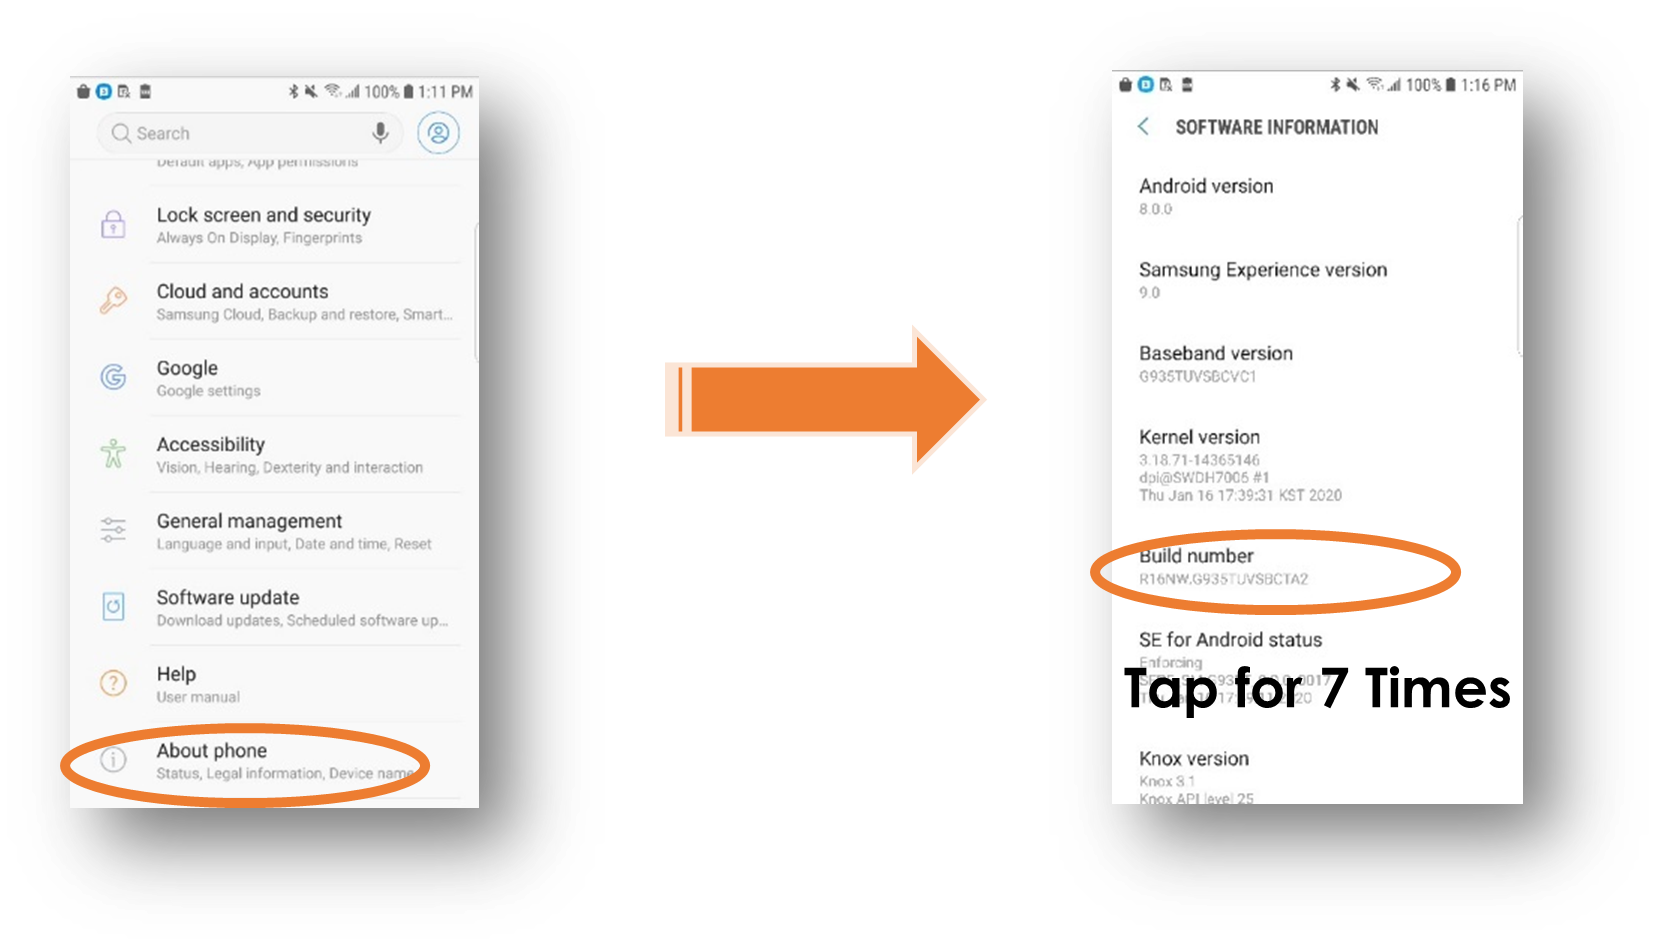
· Stay Awake.
· USB-Debugging.
· Disable ADB Authorization Timeout
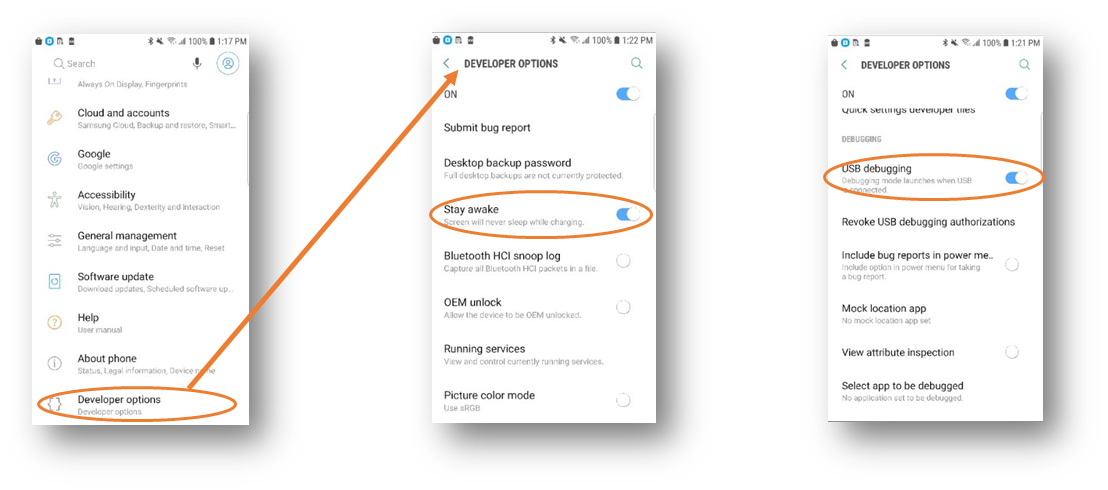
Connect the device to the LANforge as per the testbed topology. Plug the phone via the port (usb-c or microusb) at the bottom of the phone to one of the usb-A slots on the LANforge.On the phone, check the 'allow usb debugging' box and press OK.
Open the LANforge GUI window. The Interop tab should appear now. Click on the tab to see your phone detected as a port.
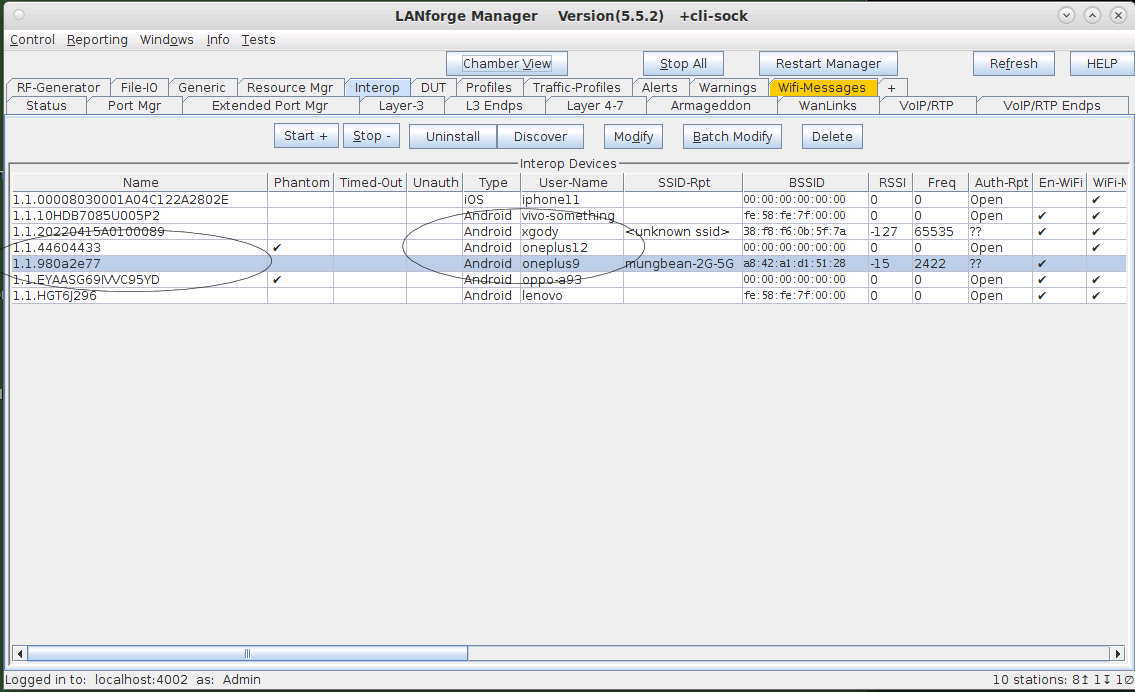
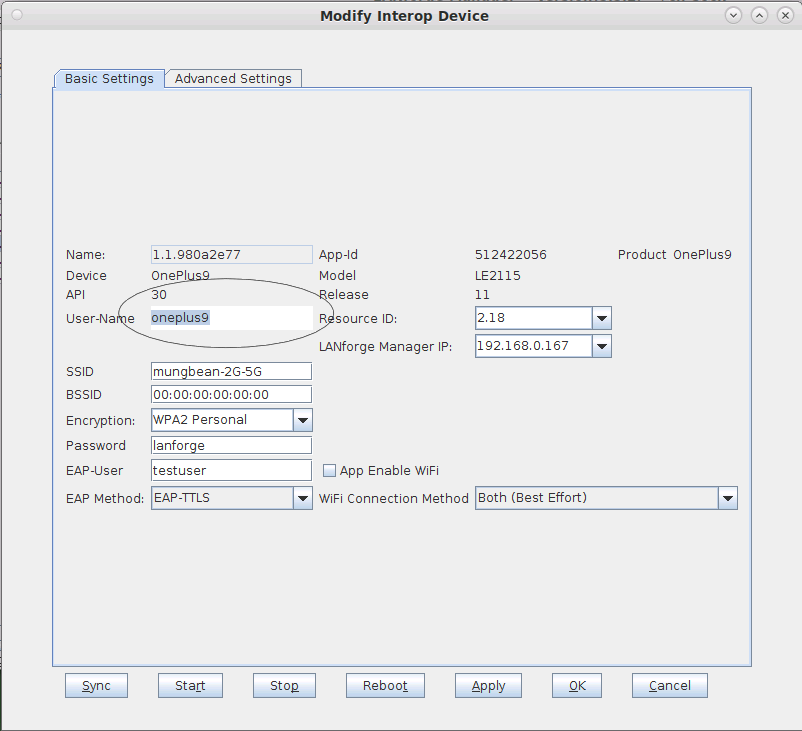
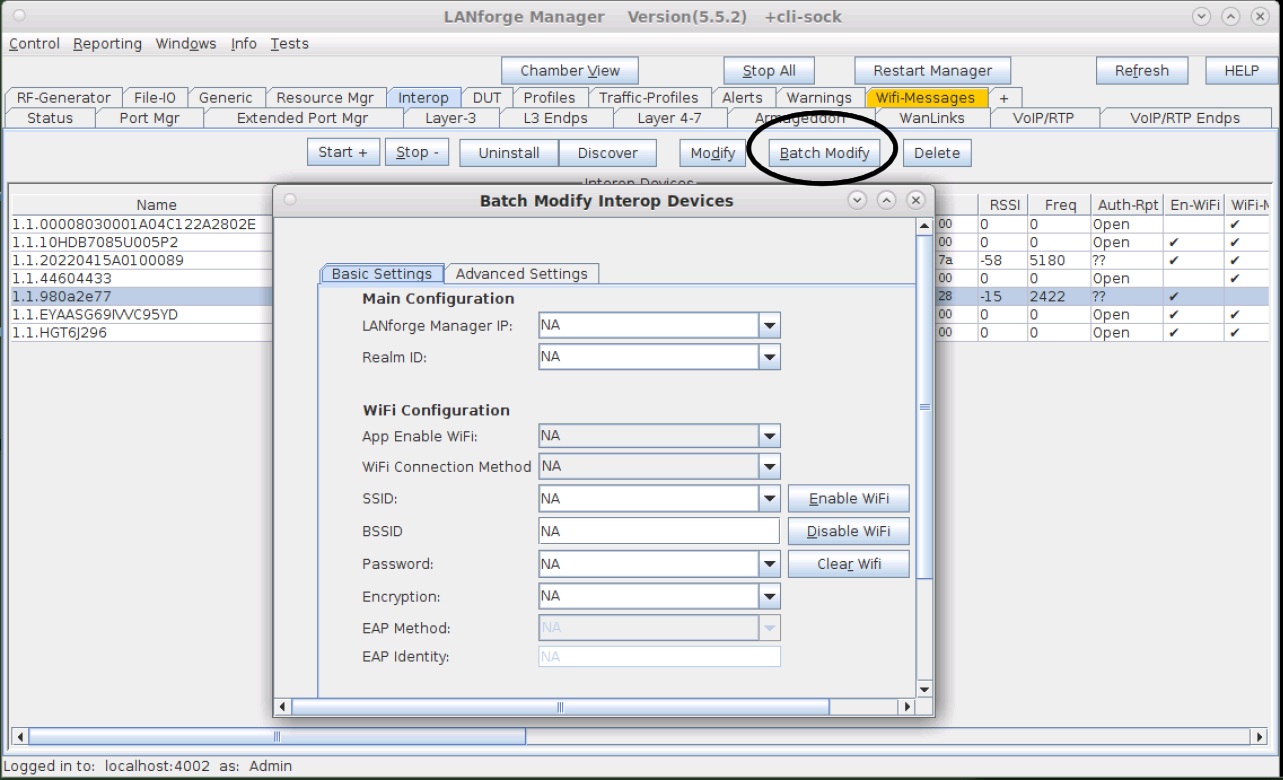
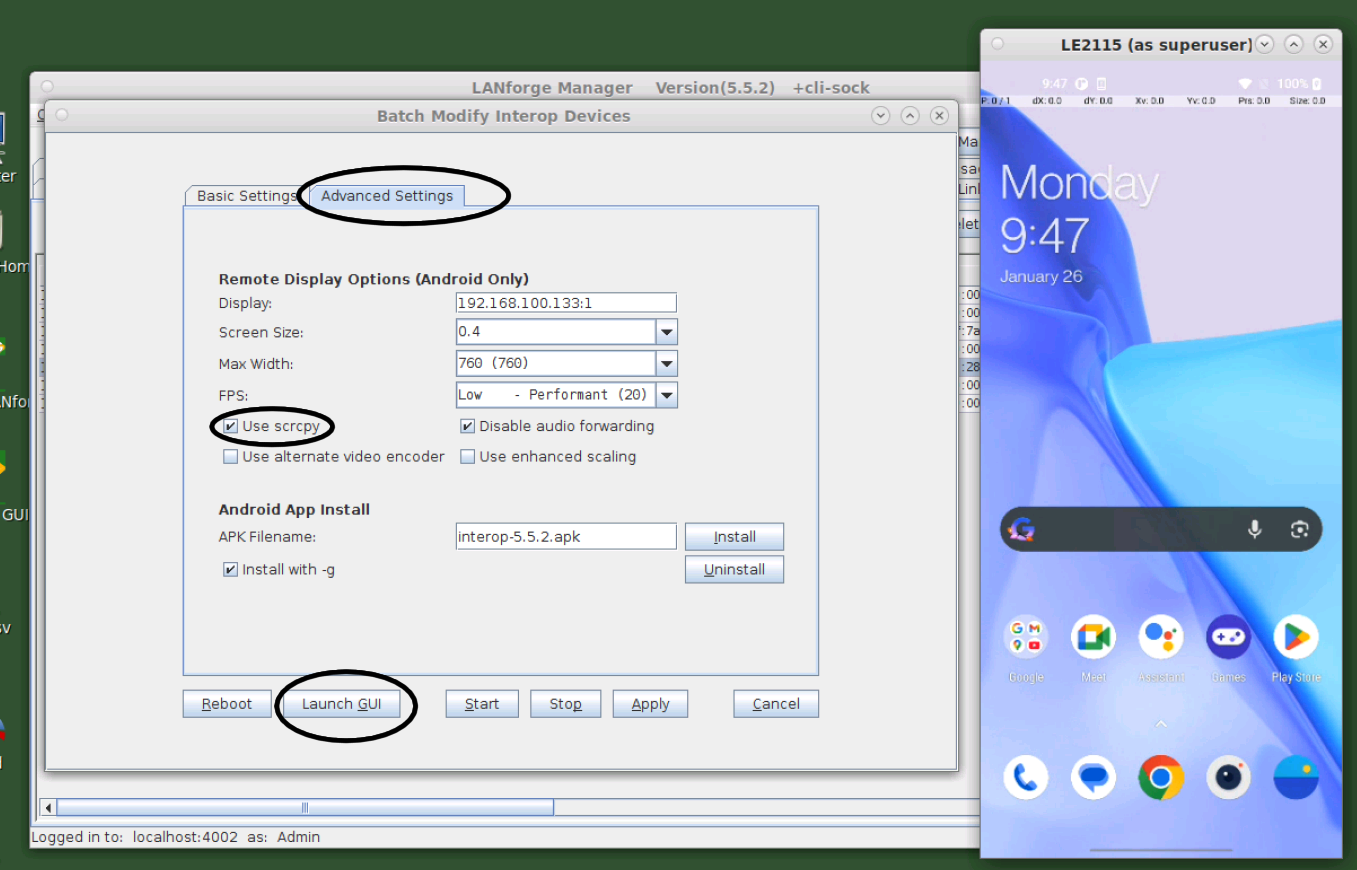
Now click on Install in the Batch-Modify window to install the InterOp app (apk).
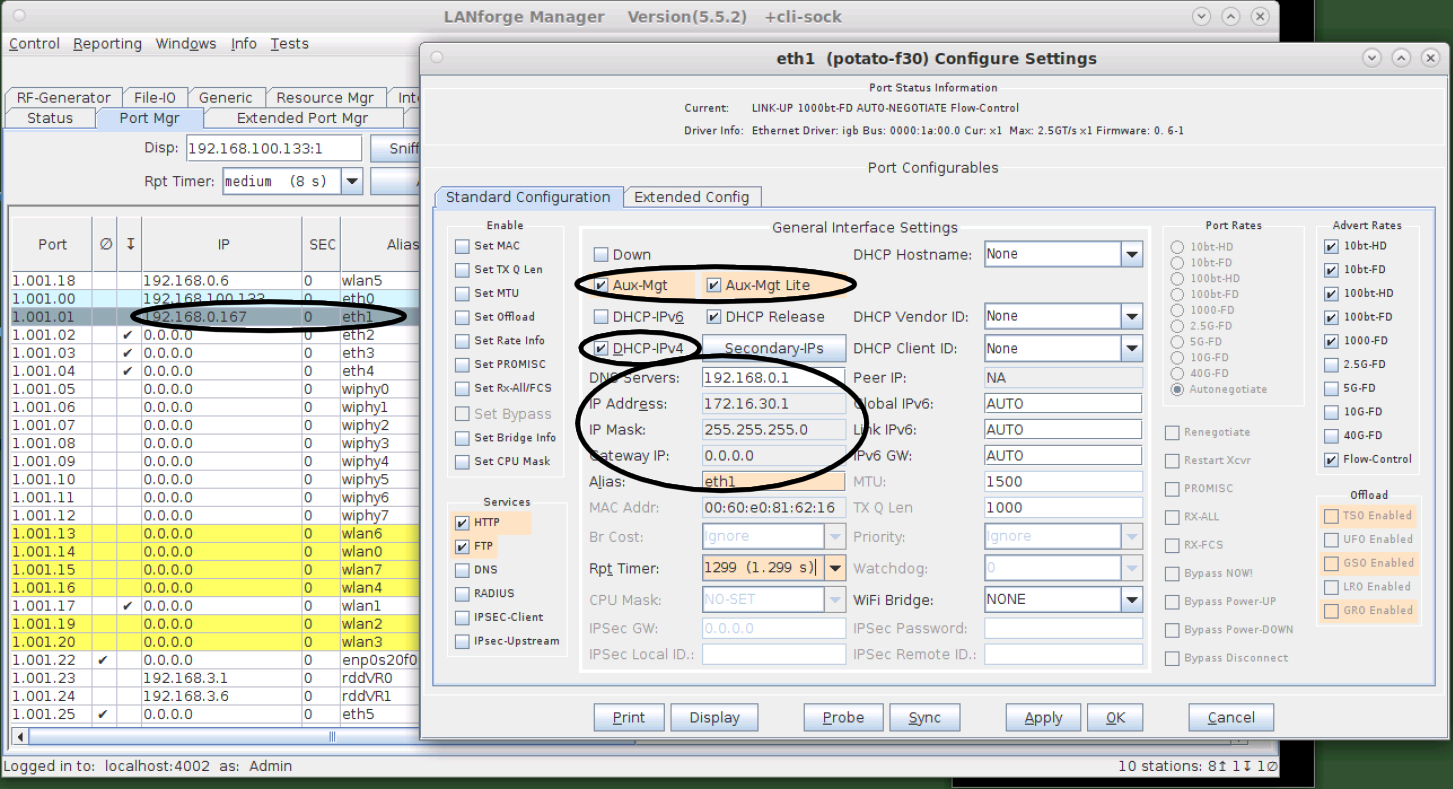
Close the Batch-Modify window. Click on the Port Mgr tab, double click on eth1, and check the DHCP-IPv4 checkbox or assign a static IP address from the DHCP pool of the AP, which is our Manager IP address.
Click on the InterOp tab again, double-click on your phone in the interOp tab (or highlight the row(s) to modify and click on Batch-Modify), and fill out the fields of IP address, SSID, encryption mode of SSID to associate to, etc (circled below). Click Apply when fields are entered. Hover over any fields for more information on how to fill them out and best usage fit for you.
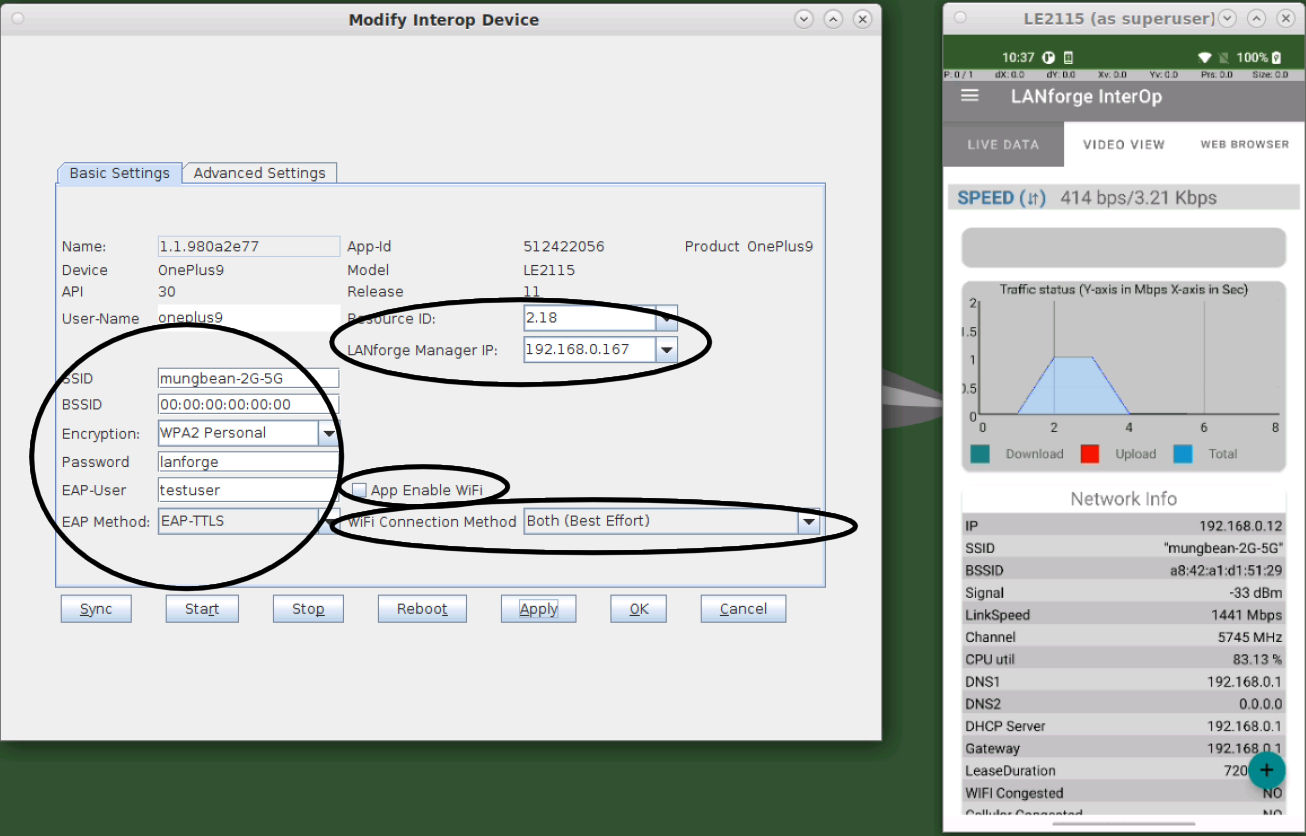
After clicking Apply, the InterOp app will open in the mobile and the Network stats will be visible. The phone can also be detected in the Resource Mgr and Port Mgr tabs in the GUI now.
Below is an example of ports like wiphy0, wlan0, rmnet0, which are the ports of the mobile. At this point, clicking on the wlan0 port[station] and Display Scan should open a pop-up in which all the nearby SSIDs broadcasted and seen by the phone are displayed.
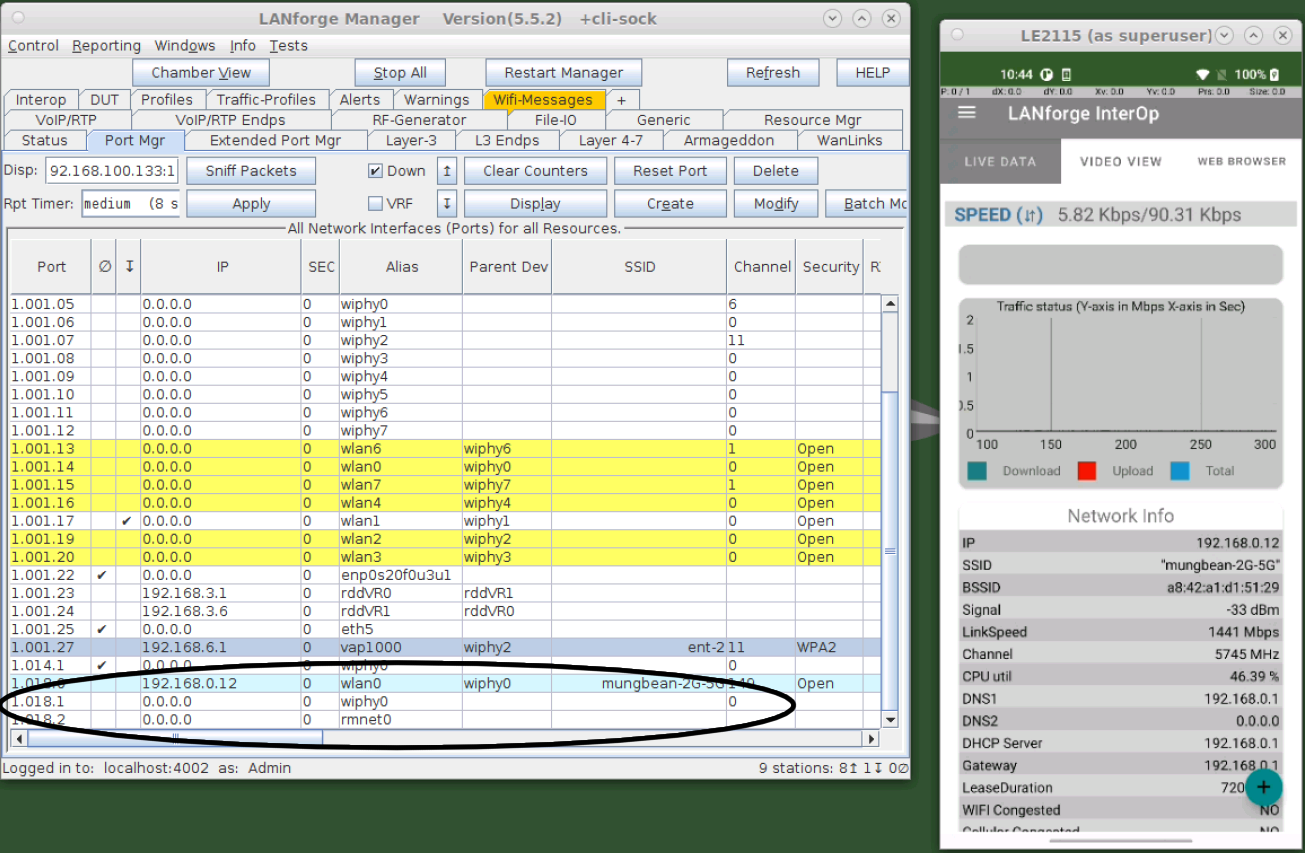
If the interop device does not appear as expected, try these debugging steps in order:
After the cable is plugged into LANforge, there should have been an RSA checkbox 'allow usb debugging' that popped up. Make sure this box is checked and hit OK.
Unplug the phone. Go to Dev Options → Debugging → Revoke USB Authorizations and turn off USB debugging. Then turn USB debugging back on → plug in the phone → accept the 'enable USB debugging' pop up.
Try a new cable.
Restart the ADB server: sudo adb kill-server; sudo adb start-server
If the interop device stil does not appear, contact Candela support.
The app for android is stored in the /home/lanforge/ directory. It is stored as interop-X.X.X.apk where the X.X.X is a LANforge version that (should) match your GUI, though it may not be.
The app needs to be downloaded from the website, which is automatically done if the GUI is upgraded. However, if the GUI is not upgraded and you want to just update the app, the app must be downloaded:
interop-X.X.X.tar.gx where X.X.X is the LANforge version. Click on that tar file to download it./home/lanforge/. This should put a new interop-X.X.X.apk file into /home/lanforge/.At this point, interop-X.X.X.apk should be updated in /home/lanforge/ and ready to install on all phones. To check file stats, stat interop-X.X.X.apk in a terminal shell will tell you the last edit to file.
Go to the Interop tab. Select all Android phones (Ctrl + Click, highlight all rows). Click on 'Batch-Modify', 'Uninstall'. Then, make sure that the interop.apk file inputted is the same new one as in /home/lanforge/, then 'Install'. This will ensure all phones have the latest app in the folder.
